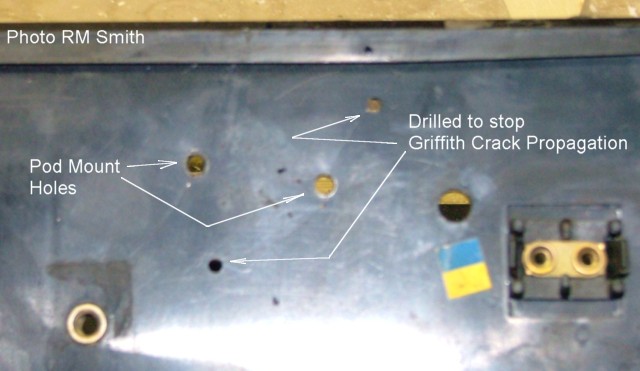
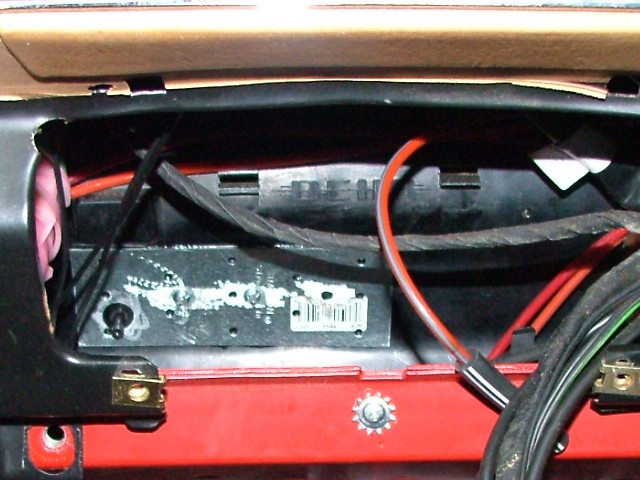
The Author's "Dash-In" repairs For two days I have been repairing/replacing my vacuum elements. After finishing, I took her for a shake-down run. Everything still works to my great pleasure (never know since you have to disturb SOOOOO much stuff). Summary: Took out radio, climate controls, shifter wood, console, glove box, carpets, under-dash panels, carpeted bolster and eventually driver's seat. All this to get at the bottom of the heater box. After removing a few other asundry parts, I removed the bottom of the heater box, repaired crack(s) via mending plate, and renewed the legroom vacuum element. Next I reached up inside heater box, and thru the front vent, and removed the center vent pod. I repaired broken box via mending plate, renewed vacuum element, and re-installed (since my heater box was broken, I could easily remove the pod by dropping it down after disengaging the lever from the flap). I reinstalled the bottom of the heater box and then attacked the Defroster pod. After grinding a bit, I was able to disengage the operating lever, grabbed my pod-popper, and pulled out the little bugger (leaving the top part still in the mount). I renewed the elements, and reinstalled using a #8-32 pan-head allen screw and nylon lock nut to reattach the operating lever. Buttoned everything back up and VOILA! I should mention my loving wife shampoo'ed the carpets while they were out, bless her heart, and my youngest Son's help was invaluable as well.! Photo #1 Here's what greeted me when I got the lower heater box out...
Notice barely visible, the cracks from the pod mount holes...
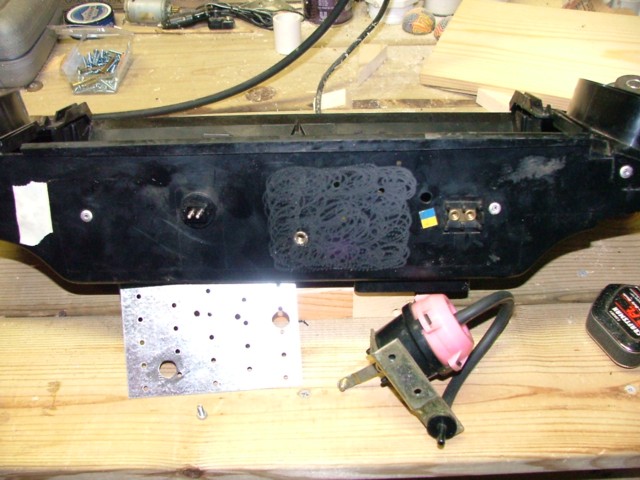
Photo #2 Here is the lower heater box ready for repairs.
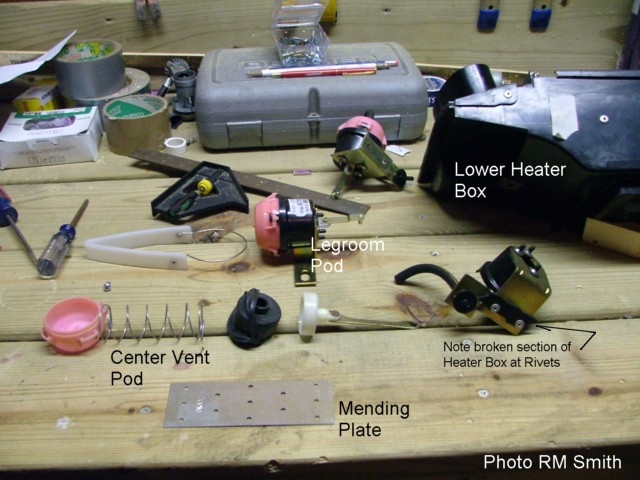
Photo #3 This is what you often find after you take a pod apart. Note the diaphragm is torn at the seal.
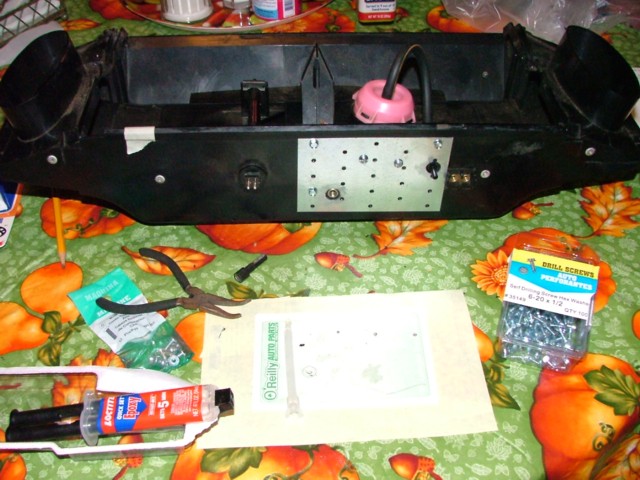
Photo #4 Repaired lower heater box. I used 5min epoxy and a few self-tapping screws to secure the plate, and replaced the rivets for the pod mount with pan-head screws. I applied glue to teh threads upon assembly to prevent them from loosening...
Photo #5 The upper heater box repaired. I used the same technique as before on the lower heater box. Before applying the plate, I replaced the broken section, smeared the plate with 5min epoxy, and sandwiched the repair with pan head screws. Once again, I coated the screws with epoxy.
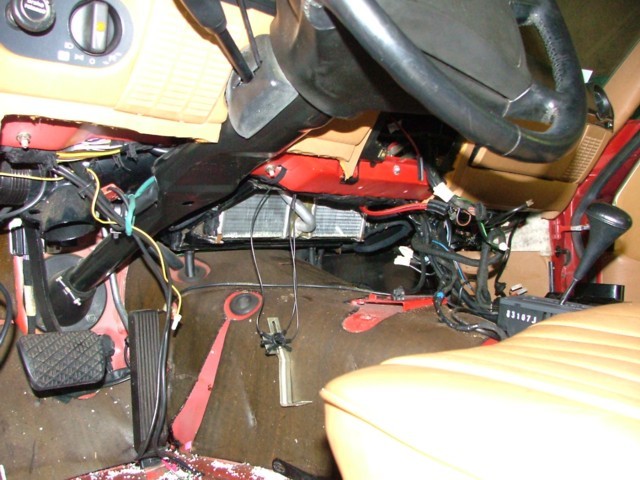
Photo #6 This is what the interior looked like, prior to re-assembly.
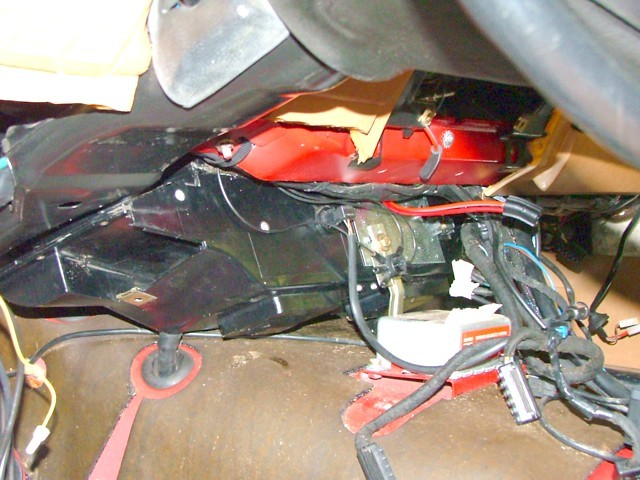
Photo #7 Drivers' side with lower box out...
Photo #8 Drivers' side with repaired lower box replaced...
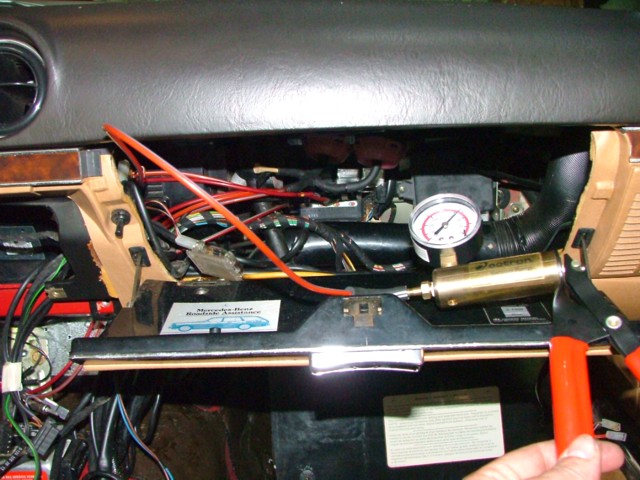
Photo #9 Function test of all vacuum circuits... evacuate to about 300millibars, and watch for leakage. A slight leak is permissible; however, the needle movement should be so slight as to not be noticable.
Special notes: Do not attempt shortcuts... you will only pay for them later. This I found out when removing the console. I removed the armrest, but still had diffilculty removing the console from the car. I had to remove the seat to get the console in... Be sure to read, read, read the service manual before attempting, but recognize not every step is mentioned. I encountered great difficulty removing the box, only to discover it was a wire tie, securing a wiring harness to the heater box, that was halting my progress. On removing the console in my '88, there were two additional screws, located just below the shifter, that were not mentioned in the manual. I would not recommend this repair for the weak-at-heart. On a scale of 1-10, with 10 being nigh impossible, I would rate this a 7-8. Takes notes, pictures, sketches to help if in doubt during disassembly.
Good Luck!
|